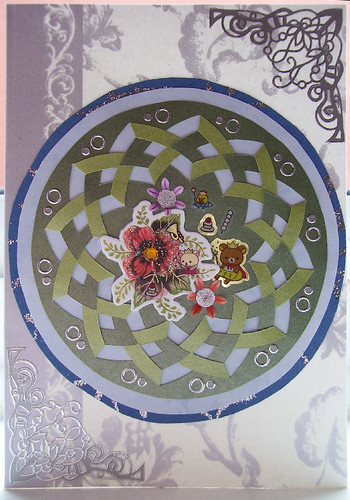
I'm becoming less interested in Grand Fantasia and using much of my time crafting. Above is one of few cards I created for the year. This was for my cousin's birthday I'm influenced by mandalas and patterns. Would like to create more beaded or paper embroidery cards/artist trading cards (atcs). Now the World cup is on, I'm only watching a few matches, Italy, Spain and England (Even though the first match was dismal). I acquired an another Japanese Crafting book - かわいいフェルトの小物たち (Cure felt goods), ISBN ISBN9784418092192. You can buy from
yesasia.
I have worked with felt before and found the material fragile, piles easily. At first glance I noticed the patterns resembles those of stuffed animals. These are my early attempts, a rabbit and chibi panda. Not a good idea to use salvage felt because it splits and pencil is not recommended for drawing around the paper template because it shows up in the sewing. I noticed a lot of other people's felt work the stitching is loose whereas my stitches are tight because this is how I hand sew. Have not yet mastered the sewing machine. Most of felt projects in the craft shops are too simple in design.
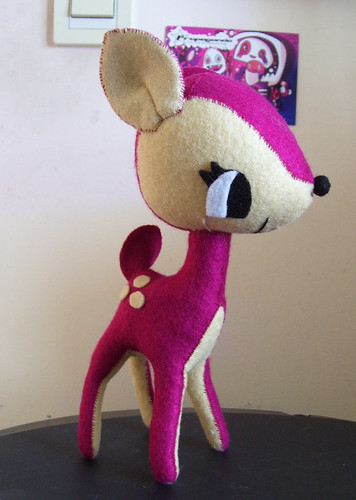
Projects become more advance further on through the book, the patterns for the deer are on the cover. The felt deer plush appears on the book cover. It was the reason why I wanted to buy the book in the first place. There was a lot of sewing involved and took me 2 days to complete. I used rose and cream felt because the pink I found in the craft store was very bright. As with all Japanese books I found the diagrams clear if in doubt I check the kanji -Japanese Chinese ideograms for any clues but some part you can make an intelligent guess. I despise people who moan or complain it's no in English. Make some effort to learn Japanese or any other language it's not difficult. Besides there was no body to help me I learnt thorough trial and error. In all I found the felt projects very easy to sew and off to make more.