Showing posts with label paper craft. Show all posts

2 Aug 2013

My thought in SMASHing

It was actually through looking at some images on flickr did I discover some new. Ever heard of Smash book? From what I've been researching and watching youtube videos did I decided what it was. Basically it's form of scrapbooking which uses basic craft material no fancy album, pages, embellishments. The official folios are by K & Company have a look at this link but generally all it is grabbing all the ephemera, mementos you can't throw about and give them a home. I have been doing this stuff for years since when I was studying Foundation Art and Design by then it was Visual Diary and influence by Photojournalist Dan Eldon who died by being stoned to death by angry mob.
I keep sketch book/visual diary out of habit my idea needs some where to go. Here some sneak peek  of my scrapbook :
 This was want I was doing before basically stuck stuff without special arrangement or decorations
Samples of work, projects completed I add them here with some handwritten notes. GCSE Design and Technology we were told to annotations I thought they were pointless only at College did I realise they are important otherwise I'll forget the little details.
Paper ephemera, packaging I add them here. I love non Roman packaging: Chinese, Japanese as makes a change from see English words of every day living.
 I'm using a handmade paper journal brought from fair trading shop which is long gone. I have only a few pages left and will soon need to find new home from my treasures. This is not the only book I have 4 either in the garage or in my room some where. I'll show some pages once I've found the other scrapbooks.
I've tried scrapbooking and even brought a book on the subject but seems too formal and incompatible to the way I work as I prefer to experment and over collage.
You don't have to buy Smash folio in order to stick things I use this:
 I've found this the Arnofini and cost less than some fancy journals. I did use as diary until the frustrating of trying to write perfect lines of text. All is not lost. You just have to figure way to reuses stuff.
 Here are selections of pages there's not much as I only started Smashing early this month and then the crafting challenges and mandatory swaps got the way.
 As you see I love collage I remember in my altered book, spend a lot time making actually embellishments than actually sticking. I hope to use some of pages as a home for my tags of 2013.
 I have photos which are not yet catalogued some dating up to 2003, the time I was in Barcelona. Some sites have printable smash elements I find the links in Pinterest needs updates as some are either dead or have to plow through pages. I love to join Pinterest one day.
I ever dedicated a 2 pages to my favourite hamster Rafa. He's so sweet even thought I have Oscar I can't help missing Rafa though. I will make page for Oscar too in fact every week I try to take as many pictures as possible didn't get a chance with the Roborovski as usually active at night and very fast. Here is folio I brought from Amazon
 Red doodle book, inside all the pages are decorate to give you a head stand.


 I couldn't help buying some goodies at well. The grab books looks interest I prefer K and Co ephemera pack. In saying that I loads of scraps and paper stash, printed lots of Journalling elements and collected more flyers and leaflets. I'm a terrible hoarder.
Don't know if I'll ever get the chance to use this Red Folio because all the interested photos I've printed will ended up the Walls Journal. But life is one big journey, now I see that every day can be documented onto a page as well. Start with a month, week and day. Interesting events only happen once in a while. There's more to come on this intriguing subject in the mean time have a look this video you will hooked too.


1 Aug 2013

Catching the last train to Craftstamper's Take it, Make it challenge

I think I just made it as the deadline is tomorrow besides I'll be off hunting painted dog sculptures.
Craftstamper's challenge was to create something using layer embossing as shown in July's edition.
Problem was I thought it was plain heat set embossing but reading the entry again and looking at the entry confirmed my suspicions. The card below was created last night using free clear stamp which came with June's issue, Wings is from Rockstar set Inkadinkadoo and some freebies from card making in simple steps.
I actually went out and brought some a set of coloured embossing powder they were cheap and discounted further. A craft store is relocating so everything is 50% off such a shame as I love the store's own brand glue as it doesn't warp the card or paper that much.
There's some elements I'm not happy with in fact I wasn't satisfied with other card my made it's just my inner critic and needs to get things spot on. Well there's so much I can do as all the monthly challenge have closed.
For Craftstamper's Take it, Make it Challenge 3: Layered Embossing.

I have been trying to find some time to do some more Smash book journals. I do have Red Folio by K and Company plus a few smash items. I'm trying to keep all my scraps and mementoes in one place but ends up as large heavy bag not that much portable than the bag I carry with me.
Still can't craft in the daytime and my chance will run out next week as I'll be on work placement. I hate working late at night because of lack of time maybe I feel so stressed out plus my day is not complete without spending some playtime with my hamster.
I'll see how it goes

27 Jul 2013

My entry for July Challenges

This month is almost over and deadline for Challenges are around corner. I'll keep this short as I have a bit of headache and didn't get much sleep last night because an annoying person kept me up. I caught some sleep in the morning which didn't really help.
This card I kept things simple and used only 4 Distress Inks colours: Faded Jeans, Tumbled Glass, Dried Marigold and Tattered Rose. With a few dabs of Adirondack Color Spray: Terracotta and Cosmic Shimmer Vintage Mist Patina.
Stamps I chose are Stampers' anonymous Mini Ornates and Fairytale Frenzy, Hampton Art Stamps Splatter, Stampingbella mesh and PaperArtsy Hot picks.
Other tools are Martha Steward Vintage Doily Edge punch and Distress Stickles Pumice stones
Embellishments: faux flat back pearls and Idea-ology Paper string stripes.
The paper flowers are all hand cut and stamped with floral from PaperArtsy Hot picks.
For Stamping Sensations July challenge Sketch and Summers colours and
Country View Crafts July Challenge Summer Sizzler
The choice was to use sketch or colours and I did both. Minimalism is not really my thing as I come from a Eclectic, sometimes Chaotic background and like it this way. Sketches are helpful in the layout but rarely do I follow them. I can't find any use for Paper strings other than tying up stuff, you can sew with them, pierce the hole and add a touch of glue to one of the end and use as needle. Metal needles will tear the card. The orange gives a zing to cool blues it feels intensive heatwave meets heavy rain which is what I'm experiencing right now. More to come that is if I can complete another project for another challenge.


20 Jun 2013

Second entry for Visible Image June challenge

Second card for June challenge  'Visible Image has character' is
Clara, she is first card I made and took me 6 hours to complete the card. I was working on card sketch layout. She and Edgar were embossed on 250gsm cardstock and coloured in Distress stains.
For her I chose Seedless Preserve, Aged Mahogany, Walnut Stain, Scattered Straw and Brushed Corduroy. The skin tones are a mixture of Spun Sugar and Scattered Straw as glazes, I tried to remove the stain from her face and area become napped up hence importance of having clean hands.
I always used precoloured embellishments as it saves time. I believe the lace is in Chipped Sapphire and Pine Needles. The background is light mix of Aged Mahogany and Tarnish Gold with middle section stamped in old free rubber stamp of Craftstamper before they gave away clear.
There's more paper flowers here accented in Stickles Shabby shutters and Weathered wood. I used Tim Holtz's method of adding acrylic paint to foliage Idea-ology to give worn feel. The reason I added a clock well it originally piece of grungeboard and thought using clock face would better because influence by Doctor Who. Current Doctor played by Matt Smith, he's assistant is Clara Osward otherwise known as 'impossible girl'. Besides there's lot of Steampunk influences in Doctor Who and can't wait for next one.

Visible Image June challenge

Ever heard of Visible Image I haven't until I discover them in July 2013 issue of Craftstamper magazine. Not only was free 'clear' stamp designed by Visible Image but in their advertised it showed some of range of stamps produced by the company and they are great too. What caught my eye was anime/manga inspired character stamps, I normally stay away from cartoon stamps because to be honest they are rubbish and stamps cost money so I only buy high quality impression.
I had bad experience with 'clear' stamps especially Stampendous as they tend to squishy and yellow but with Visible Image I gave an exception they use high quality photopolymer, their stamps are firm and give a good impression. Pop along to their website and gave the stamps a try.
Also they have monthly challenge going on their blog, For 'Visible Image has character' I will enter 2 cards, first one:
Edgar and his pet raven. I chose Steampunk style because character really suited to this theme. I did some research to get idea of what Steampunk the best way to do is look at fashion for colour scheme and definition. Majority of art involves clocks and gears but it's much more about this. Think of Doctor Who, HG Wells it's a good idea to watch some films/animation such as Steampunk.
Distress stains work well if layered or mixed with other colours here I used Seedless Perserve and Brushed Pewter for background. Edgar I coloured him using mixture of Distress Stains and Markers plus Ink palette as help to separate the different colours which are Pine Needles, Black Soot, Chipped Sapphire, Brushed Corduroy, Scatter Straw and Aged Mahogany. Highlights I used Inkessential white gel pen. I'm still practising with watercolour techniques using the Stains made it easier, the Markers were harder to manipulate the colour.
There's so much metal components on this card it kept falling over as I trying to photograph. I was thinking of dials and gears which compliment they each because everything is on the card for a reason as to convey a story. Idea-ology Sprocket gears, locket keys, Time pieces, Game spinners and other miscellaneous antique brass embellishments.
The side panels is stamped in Stampers' Anonymous ledger and others with embossed in Stampendous Fran tage aged bronze.
This month has been hectic with all these monthly challenges I'll leave Craftstamper for next one because need a rest. These challenges are good thing as keep the resistance and block way.

18 Jun 2013

Another set of cards for Stamping Sensation's June Challenge

I intended to make another card for Stamping sensations and ended up with 2. They have both the similar layout and bird themed stamps only difference is the colour.
This one is darker and still worked on card layout sketch, majority of materials came from Issue 62 of Papercrafter magazine. Infact there are several card and papercrafting packs of goodies but all cost £7.99. This stash has the summer palette of pinks, blues and greens. In Crafterstamper they showed how to make your own paper tapes using double sided sticky tape. I sort of panic because there was a colour clash or LED light was playing tricks on me. I just blasted the background in terracotta Colorwash spray and added lighter colours in the foreground.
Main stamp image is from Paperartsy Hot picks range and others are Crafty Individuals. I've found some wonderful Asian foam stickers from a crafty store. Normally I buy Sanrio, San x and other Japanese stickers in Hong Kong just to show there are good thing if you look in your local craft shop not Hobbycraft.
I decided to enter this one for Stamping Sensations: Summer Blooms. I'm still making paper flowers by hands but more sculptural using glossy accent to glue them on and gem in place of a brad.
Paper is from still from Papercrafter magazine collection.
Rubber stamps are: Stampers' Anonymous-Tim Holtz, Crafty Individuals and Cox and Cox- birds and nest stamp collection. It does still has more over collaged style but I'm working on the minimalism.
There one more set to complete before I rest for a bit and craft again.  
This is what Oscar made he altered a loo roll and is in process of altering a cloth.

13 Jun 2013

My take on Tim Holtz's June Tag of 2013

Watercolours are not my kind of thing because I find them hard to manipulate the colours and prefer to use acrylics. This month's tag is quite a challenge for me the end result is not that bad and I figured out how to get even coverage of colours in the non wrinkle technique.
June's tag involves the use of Distress Markers and the use of an auto wet brush basically to blend and mix colours. This is my second attempt I was worried because the layers of colours wasn't blending immediately only realising later it's one those time delay effects. Hard to see what the actual colours he was using I used Rusty Hinge, Fired Brick, Faded Jeans, Broken China and Pumice Stone.
Distress Inks- Walnut Stain was used to darken the edges.
For the non wrinkle blend involved the use of 3 different Distress range mediums Paint- Broken China, Ink-Dusty Concord and Stains-Wild Honey. The key is not to mix the colours too much but can be layered. Tim left out details on what to add to crinkle ribbon to finish off the tag I used a mixture of Distress Paint- Broken China and Stains- Wild Honey and Scatter straw.
The Background rubber stamped I used PSX, Paperartsy and Stampers' Anonymous 6 to show that June is the 6th month in the year.
What I do with the monthly challenges projects I displayed them in my unfinished Artist's Shrine. More of building site really and the penguin needs to completed. Tim's tag was completed very quickly and spend the rest of evening playing with Oscar the hamster. He was on the gnawing mission last night and made arched doorway on the loo roll. Maybe I'll include more of his creations.

9 Jun 2013

June Challenges and say Hello to a new friend

I'm still new to these challenges and sadly none of my work has gone chosen so far it has been a while since I last made a proper card or any with rubber stamping. As the old cliché it's not the winning but taking part which counts and each day is fresh page in a journal waiting to be filled.
For June I decided to enter this card in 2 challenges:
Country View Crafts: Die Cuts
Stamping Sensations: Summer Blooms
I doodled some card sketches and chosen a colour palette, to me June is start of summer this season's colours if sorbet. I used Candy: Dark Red, Greens, Blues with Walnut Stain.
Lots of Distress Inks and Stains were used so I won't go into much detail as usual I pick out whatever pre Distress paper scrap in stash. Don't have die cutting machine but have lots of Die cuts in fact 38 pages brought from Create and Craft. The trellis was painted using Distress Crackle paint: Antique linen it turned out green. The roses individually hand crafted from 4 hearts punch using 10 pieces with some small punched leaf details, the flowers took the longest to make.
Rubber stamping were in Stazon Jet Black and used: Crafty Individuals, Stamper Anonymous, Paper Artsy Hot Picks, Birds and Nest set from Cox and Cox.
I should of used an aperture card then wouldn't need to cover the edges with paper string: idea-ology.
Finally added small touches using faux gems and flowersoft.
Not too much of background were hidden by embellishment I have been known to over collage things.
I have still have Tim Holtz June tag of 2013 to complete plus my version for February. In the meantime say hello to my new best friend. He is called Oscar and is Syrian hamster I believe is about 3 weeks old.
I brought him on Monday from Pets at Home, in fact all Syrian hamsters are boars (males)
He's panda coloured and I worried about him on Monday and Tuesday he was active and playing on the wheel but changed on Wednesday, barely eats and spends much time in his house and only comes out to collect wood shavings to build a nest. I've checked Oscar last night he doesn't seem to have wet tail and still fairly active. Since he is still new maybe still settling in, I remember what happened to Cherry the Chinese dwarf she suddenly died in within 6 days.
Hang in there little Oscar.

RZ-028 Blade Liger Papercraft model

I received request for more details of the RZ028 Blade Liger Papercraft model, the original post was on ipapercraft but the blog was closed downed and all model downloads current being transferred to another. I don't know who was original creator of template and all I know it doesn't contain any instructions on how to assemble just pictures of various completed parts. This papermodel is suitable for beginners but for anyone who wants a challenge.
Download templates at:
Original rar file
Zip file
Pdf only, be sure to download the following images there are 10 in total
rar files can be opened with Winrar


Here are the parts I've completed so far
 Head


(Not shown: Back legs and tail). The body is tricky part sadly the model is incomplete because it got damaged like some of other model (by malicious person) and my old printer is on the blink. I'm planning a remake of whole thing once I get a new printer.
The materials I used:
 ColorBase Vivid Card 170gsm Chocolate, Coral Red, Kingfinger Blue and WHSmith brand 160gsm bright coloured. No less than 120gsm as some parts like legs has be sturdy.
Anita or any tacky glue which is not slow drying or gummy.
Tweezers and tooth picks for spreading glue these are optional.
Paper piercer for scoring lines
Bone folder for sharp folds
On the pages which says Black print out on any dark coloured card stock (I chose Chocolate/Dark Brown) to make it easier to see the cut and fold lines. You have to match the pieces with those completed in the photos and recommended for more advanced papermodel assemblers. I started since 2008 and been on and off, I do have other crafts.
Good luck


19 May 2013

My take on Tim Holtz configuration boxes

It started with matchboxes shrines and then I thought I could combine several to make shadow boxes with different compartments. I was influence by Tim Holtz idea-ology configuration boxes but these are so hard to get and on most sites only book cover type is available. There's one place I can still try Sir Stampalot I used to buy wood mounted rubber stamps and Magenta pewter stickers.

Configuration boxes are also expensive it would be cheaper to make my own after all I've done a lot of paper crafting in the past (assembling papermodels). I started with 9 matchbox layout and changed so that I could smaller shapes and these can be rearranged. Each box is made out of Paper stacks- Lost and Found with left over sheet from K and Company. It helps to check the stuff in clearance shelves for more bargain goodness. I realised I could of drew the layout in PaintShopPro or DTP along with the individual boxes and print directly on the paper. The good think about idea-ology paper stash is the other side is plain.
I certainly I won't buy the crap from Create and Craft they are so bland and also p and p builds up with each item added to basket. The presenters act like complete noobs, well any way shadow boxes are like 3D scrapbook or collage- assemblage and great way of displaying mementos.
The trouble is I have to deal with no only tiredness, but excessive noise and idiots who won't watch in tv in silence and have volume turned on full blast. Looks like I going have to invest in noise cancelling headphone at least I won't have to hear the spite comments and devil worshipping crap.
I feel a day is wasted if I don't make something.

26 Apr 2013

April tag of 2013

Here is my interpretation of Tim Holtz tag for April. Yes I know it's almost a blatant copy but I used different elements and managed to nab some material before they were out of stock.
Luckily that's crafty  sells majority of items for anyone wanting to attempt Tim's challenge.
Local hobbycraft store stock some not much.
 I used metal charms- Philosophy tags, foliage, game spinner and word tags and did some improvisation with tissue tape and cut out my own 4. I wondered why the number than thought April is the fourth month in the year. Art Parts modelling film is thicker than shrink plastic and tricky to use since not used to this new media but I have future uses for this material.
At the beginning of the month metallic Distress paint weren't available I shop on artist trading post as well as they have more extensive range or products. They don't sell idea-ology 8 I have Tim Holtz's app and added the stuff I want to the wishlist. Still think washi tape is stronger and cheaper than tissue tape. I'm spending a fortune on one project and never wanted to get Distress Paints if you have Paint dabbler than don't need these. Almost finished with the palettes actually in the future I'm going to use whatever in stash unless really have to buy these items. Idea-ology and Distress is really expensive there's other I could of brought like Paperartsy, 7 Gypsies and other antiqued metal embellishments.
It's just I notice the ones which were selected resembled what Tim created. Would be nice if my tag was selected I'm not bothered anymore. Art can be made with few simple items but I'm an eclectic artist crafter. On 2012 monthly tags I thought he would do something special like in his Compendium of Curiosities. Besides I have to play catch up with February I will make 2 as one of them is going to have to be celebration of Chinese Lunar New Year. Snakes are cool.


13 Apr 2013

Free time after 2 weeks of studying

Whenever I update my blog I first have to update my flickr photostream as well after filling in the descriptions its exhausting. I was off for 2 weeks on study learning about customer service and First Aid and had little time to do my posting which is steadily building up. In the free time I did have I managed to make some atcs and few of these.
My tags were chosen at all not be let down I started again and focused to making tags for January. My first tag ends up being too dark even though there's nothing wrong with it. Focusing what the month meant new year, winter and fresh start. Checking back on Tim's previous monthly tag I noticed he used Distress stains Picket Fence along side another colour and gave me an idea.
I used broken china as the additional colour and darken with Distress ink- faded jeans and added some peeled paint. After tinting up the wings I added some stickles it's best to squeeze a blob on craft mat or catalogue in my case and using a your finger to rub some glue on then dry using the heat it tool. If you are careful the inkjet printed image won't smudge as much. Collected some scraps and add them on numbers stamp from fairytale frenzy work great when stamped in forest moss and little outline for extra touch. Most of time I'm staring at the tag what to add because less is more. Chitchat stickers are useful to create your own pearls of wisdom but hard to choose from all those text. As there is no word for 'new' then I thought of what it represents. New day is like blank page in journal ready to filled and life can be one big journey or adventure for the soul. I've finally acquired some crinkle ribbon to finish off the tag, these work best if the ribbon is scrunched and up after colouring and dried under the heat it tool. All done I hope only use one tag for April when rest of materials arrives so expensive buying all of stuff for monthly tag in future I'll use what I have already only buy if necessary. Here is are ones created so far.
Altered this a while ago it's a holder for moo cards and was rather plain I had no idea how to decorate it so as when I brought hot fix tool I used sample gems and stuck them on felt and added charms and clasp. Now attached to my bag.
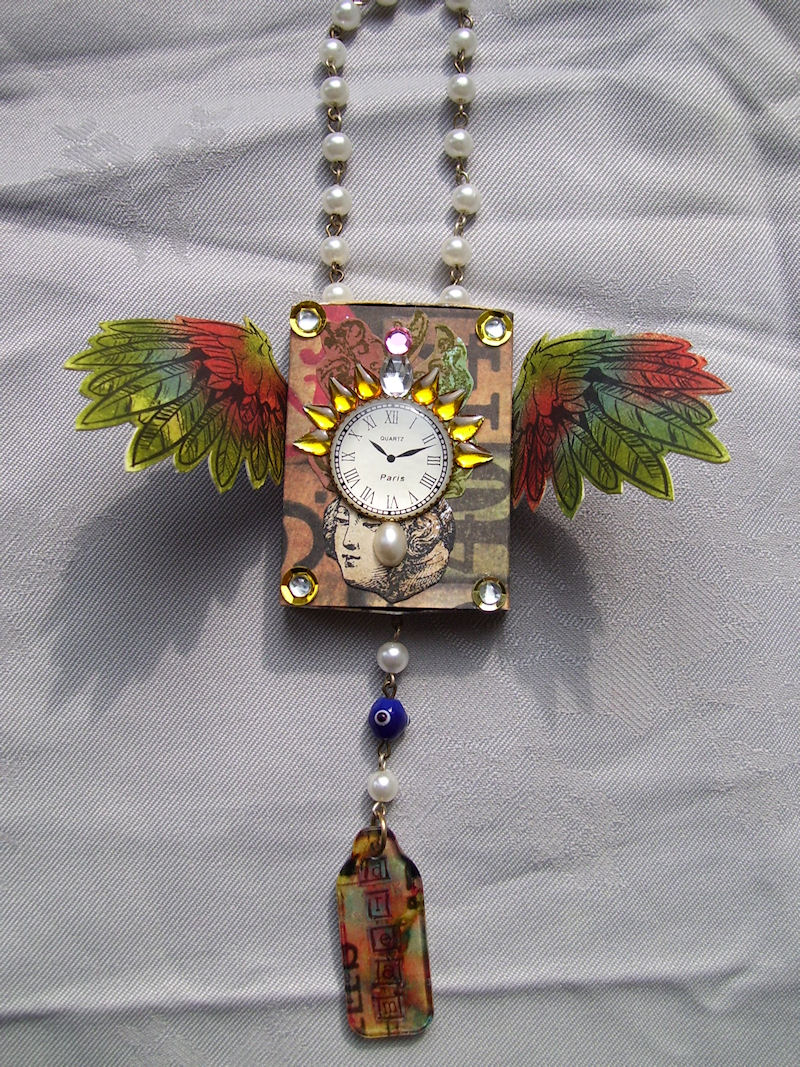
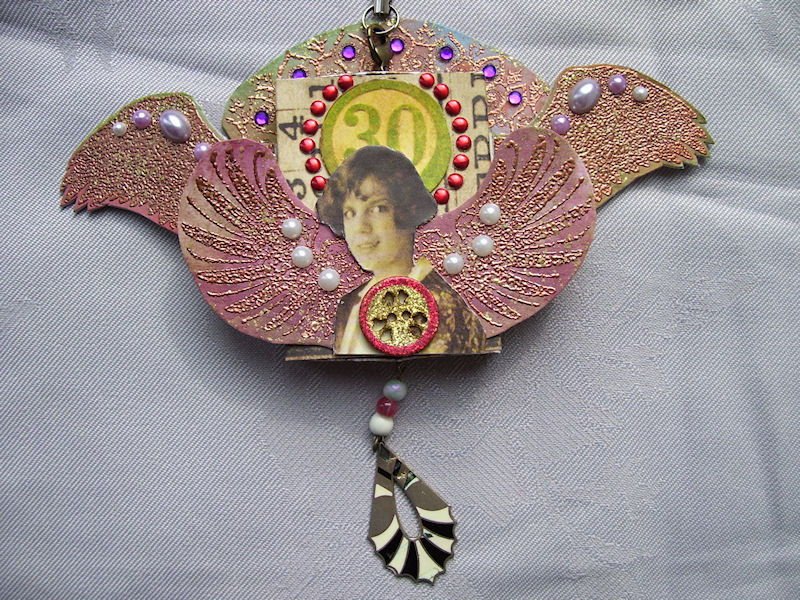
I've been looking at matchbox shrines for while when I was still studying on the course, there's one discussed by Arttrader magazine and thought to give it a try. On one boring Sunday I was making 9 matchboxes unfortunately I was sick in the evening probably something I ate, a knock on head can cause it well I did bang my head and felt some pain.
This the inside view it's better if the elements were positioned so it resembles a scene. I have collected some much 'stuff' over the years and majority of don't fit. Oh well use a bigger matchbox next time.
I discovered when I was making the matchbox shrine it crosses over with my jewellery making skills. The whole process feels like assemblage not just a collaging a great way to use bit of scrap. I was over the top with the wings, majority of matchboxes I've seen uses butterfly wings why not bird or bat. If you have wings than fly.
I have a lot of clay elements which are too fragile to be used as jewellery, tags and shadow boxes might be useful. It takes 2 days to complete, 1 day for sanding and painting and another for layering of varnishing. I was partly influenced by the configurations these cost money but buy something you can make already it takes a little time.

23 Mar 2013

Why patience is a virtue

It pays to be patience well after I submitted my work to March tag of 2013 I've the noticed the colours of the tags were washed out and not bright compared to other tags. Once again technology has let me down if it's not a tablet it's the camera on the smart phone. You always take pictures using a digital camera in best light as possible. So I tried again this morning its still raining.
This is what the tags suppose to look like and colours are brighter and details are more clearer.
'Light' version I used one of floral imagery from Paper stash- Lost and Found as background and sanded it as suggested on Tim's tag. From the same collection I used rabbit card and distress the edges with Walnut Stain. It may not be clear but flourish masks were used for reversing masking along with Peeled paint, further colours were added Faded Jeans and Ripe Pesimmons.
Great thing about Idea-ology Paper stash is they have reversible distressed colours on the back each sheet. There wasn't anything suitable in coloured papers in my stash so I used a scrap from leftover projects, stamped border motif from Stamper Anonymous- Mini Ornates glued this on thin cardboard (Don't have grungeboard as yet) using glue and seal medium (this comes with handy brush).
I discovered an iron is useful in speeding up the drying time of the glue. Next I cut out circular shape, I don't have any Sizziz dies or even die cutting machine because feel there is no use for one all my cutting is my hand. Used to it because of other papercraft as in assembing paper models.
Stamped writing on several scrap of distressed paper scraps carefully drew floral motifs based on mini floret masks and used Shabby Shutters stickles, once this dried I cut the shapes out and fix them on tag using small brads, Dogwood flowers and beads were added too (From Beadery). Finally added stamped letters (Rubberstampede alphabet set), Stampendous peel offs and die cut motifs.
This tag is second attempt and more carefully planned I used the one below as guide.
I call this 'Dark' version as in more earthly tones were used. The tag was coloured using no wrinkle distressing technique with various colours- Spiced Marmalade, Crushed Olives and Forest Moss. I used Idea-ology Mini Florets masks and rubbed Walnut Stain, stamped various motif from Stamper Anonymous- Mini Ornates, Stampingbella- Bubble wrap in Peeled Paint and Ripe Persimmons. An image of rabbit (Animal Illustration by Dover publications) was added and made a small frame and flower using stamps using the same way as explained from above. The edges were darkened with Walnut Stain and added labels using Dovecraft mini alphabets with some accents using Distress Stickles.
It's too late to replace the photos with the new one I took, I'm tired in fact hadn't slept well for a week now. Sometimes there's too many ideas flowing inside my head or other people are annoying me with excess noise or being general nuisance. Hope to make a few changes to both blogs when I'm back ideally should be update the blog first and then flickr photostream. May this a lesson to take pictures of work in best light conditions as possible.