Showing posts with label collage. Show all posts

8 Nov 2013

An adventure using mixed media

In the past, I've made some panels stuck with 3d embellishments and collage this was my of mixed media. I was looking at some artwork and found something to rival the great Tim Holtz.
She goes by the name of finnabair- Anna Dabrowska and create such wonderful pieces of work. Subtle use of colour and careful playful elements. I wish I could something like that.
Here is a link to her flickr photostream it is breath taking.
Spent a long time analysing her work and figuring out the process only through watching youtube did I finally understand the process.

  • First you build the base stick on pieces of paper
  • Arrange and add embellishments
  • Cover in white gesso
  • apply modelling paste through stencil
  • colour with ink sprays
Here is my attempt in finnabair mixed media piece, the base is often canvas since I don't have any instead used one of my past 'awful' collages and get it update
I used heated plastic because gives contorted almost organic forms. Gesso can be found any where not usually used by itself in the past I used this as a primer for painting.
Looking at other people's work I don't see much dry brushing with acrylic except for finnabair. I always painted with acrylic much easier to work with than watercolours.
To stick embellishments best to use gel medium popular one is Claudine hellmuth studio multi-medium matte same one Tim uses. I just use gloss as still an acrylic medium and same thing.
I only have a few colour sprays: Cosmic Shimmer Vintage mist-patina and 2 Color wash Adirondack dye sprays. With the Distress stains Tim shows how to remove the top and decant some of dye into mini mister.
The Stencil is grid from finnabair's sunset range.
Not bad for first attempt I need to work more on arrangement of elements and save room for stencils. Paper arty have wonderful Grunge paste which does the same thing. Wished someone showed me this style sooner well I never really attended craft classes and video streaming needs fast connection.
Here is the video which inspire me enjoy
Sadly ever since August I found it difficult to get back into crafting and don't enter the challenges any more. Well I do make ATCs and mailart. Thinking of using beeswax and UTEE my melting pot has been sitting in cupboard unused as normally use it for candle making. I have a project pans specifically for beeswax. If in doubt draw.

2 Aug 2013

My thought in SMASHing

It was actually through looking at some images on flickr did I discover some new. Ever heard of Smash book? From what I've been researching and watching youtube videos did I decided what it was. Basically it's form of scrapbooking which uses basic craft material no fancy album, pages, embellishments. The official folios are by K & Company have a look at this link but generally all it is grabbing all the ephemera, mementos you can't throw about and give them a home. I have been doing this stuff for years since when I was studying Foundation Art and Design by then it was Visual Diary and influence by Photojournalist Dan Eldon who died by being stoned to death by angry mob.
I keep sketch book/visual diary out of habit my idea needs some where to go. Here some sneak peek  of my scrapbook :
 This was want I was doing before basically stuck stuff without special arrangement or decorations
Samples of work, projects completed I add them here with some handwritten notes. GCSE Design and Technology we were told to annotations I thought they were pointless only at College did I realise they are important otherwise I'll forget the little details.
Paper ephemera, packaging I add them here. I love non Roman packaging: Chinese, Japanese as makes a change from see English words of every day living.
 I'm using a handmade paper journal brought from fair trading shop which is long gone. I have only a few pages left and will soon need to find new home from my treasures. This is not the only book I have 4 either in the garage or in my room some where. I'll show some pages once I've found the other scrapbooks.
I've tried scrapbooking and even brought a book on the subject but seems too formal and incompatible to the way I work as I prefer to experment and over collage.
You don't have to buy Smash folio in order to stick things I use this:
 I've found this the Arnofini and cost less than some fancy journals. I did use as diary until the frustrating of trying to write perfect lines of text. All is not lost. You just have to figure way to reuses stuff.
 Here are selections of pages there's not much as I only started Smashing early this month and then the crafting challenges and mandatory swaps got the way.
 As you see I love collage I remember in my altered book, spend a lot time making actually embellishments than actually sticking. I hope to use some of pages as a home for my tags of 2013.
 I have photos which are not yet catalogued some dating up to 2003, the time I was in Barcelona. Some sites have printable smash elements I find the links in Pinterest needs updates as some are either dead or have to plow through pages. I love to join Pinterest one day.
I ever dedicated a 2 pages to my favourite hamster Rafa. He's so sweet even thought I have Oscar I can't help missing Rafa though. I will make page for Oscar too in fact every week I try to take as many pictures as possible didn't get a chance with the Roborovski as usually active at night and very fast. Here is folio I brought from Amazon
 Red doodle book, inside all the pages are decorate to give you a head stand.


 I couldn't help buying some goodies at well. The grab books looks interest I prefer K and Co ephemera pack. In saying that I loads of scraps and paper stash, printed lots of Journalling elements and collected more flyers and leaflets. I'm a terrible hoarder.
Don't know if I'll ever get the chance to use this Red Folio because all the interested photos I've printed will ended up the Walls Journal. But life is one big journey, now I see that every day can be documented onto a page as well. Start with a month, week and day. Interesting events only happen once in a while. There's more to come on this intriguing subject in the mean time have a look this video you will hooked too.


1 Aug 2013

Catching the last train to Craftstamper's Take it, Make it challenge

I think I just made it as the deadline is tomorrow besides I'll be off hunting painted dog sculptures.
Craftstamper's challenge was to create something using layer embossing as shown in July's edition.
Problem was I thought it was plain heat set embossing but reading the entry again and looking at the entry confirmed my suspicions. The card below was created last night using free clear stamp which came with June's issue, Wings is from Rockstar set Inkadinkadoo and some freebies from card making in simple steps.
I actually went out and brought some a set of coloured embossing powder they were cheap and discounted further. A craft store is relocating so everything is 50% off such a shame as I love the store's own brand glue as it doesn't warp the card or paper that much.
There's some elements I'm not happy with in fact I wasn't satisfied with other card my made it's just my inner critic and needs to get things spot on. Well there's so much I can do as all the monthly challenge have closed.
For Craftstamper's Take it, Make it Challenge 3: Layered Embossing.

I have been trying to find some time to do some more Smash book journals. I do have Red Folio by K and Company plus a few smash items. I'm trying to keep all my scraps and mementoes in one place but ends up as large heavy bag not that much portable than the bag I carry with me.
Still can't craft in the daytime and my chance will run out next week as I'll be on work placement. I hate working late at night because of lack of time maybe I feel so stressed out plus my day is not complete without spending some playtime with my hamster.
I'll see how it goes

27 Jul 2013

My entry for July Challenges

This month is almost over and deadline for Challenges are around corner. I'll keep this short as I have a bit of headache and didn't get much sleep last night because an annoying person kept me up. I caught some sleep in the morning which didn't really help.
This card I kept things simple and used only 4 Distress Inks colours: Faded Jeans, Tumbled Glass, Dried Marigold and Tattered Rose. With a few dabs of Adirondack Color Spray: Terracotta and Cosmic Shimmer Vintage Mist Patina.
Stamps I chose are Stampers' anonymous Mini Ornates and Fairytale Frenzy, Hampton Art Stamps Splatter, Stampingbella mesh and PaperArtsy Hot picks.
Other tools are Martha Steward Vintage Doily Edge punch and Distress Stickles Pumice stones
Embellishments: faux flat back pearls and Idea-ology Paper string stripes.
The paper flowers are all hand cut and stamped with floral from PaperArtsy Hot picks.
For Stamping Sensations July challenge Sketch and Summers colours and
Country View Crafts July Challenge Summer Sizzler
The choice was to use sketch or colours and I did both. Minimalism is not really my thing as I come from a Eclectic, sometimes Chaotic background and like it this way. Sketches are helpful in the layout but rarely do I follow them. I can't find any use for Paper strings other than tying up stuff, you can sew with them, pierce the hole and add a touch of glue to one of the end and use as needle. Metal needles will tear the card. The orange gives a zing to cool blues it feels intensive heatwave meets heavy rain which is what I'm experiencing right now. More to come that is if I can complete another project for another challenge.


9 Jun 2013

June Challenges and say Hello to a new friend

I'm still new to these challenges and sadly none of my work has gone chosen so far it has been a while since I last made a proper card or any with rubber stamping. As the old cliché it's not the winning but taking part which counts and each day is fresh page in a journal waiting to be filled.
For June I decided to enter this card in 2 challenges:
Country View Crafts: Die Cuts
Stamping Sensations: Summer Blooms
I doodled some card sketches and chosen a colour palette, to me June is start of summer this season's colours if sorbet. I used Candy: Dark Red, Greens, Blues with Walnut Stain.
Lots of Distress Inks and Stains were used so I won't go into much detail as usual I pick out whatever pre Distress paper scrap in stash. Don't have die cutting machine but have lots of Die cuts in fact 38 pages brought from Create and Craft. The trellis was painted using Distress Crackle paint: Antique linen it turned out green. The roses individually hand crafted from 4 hearts punch using 10 pieces with some small punched leaf details, the flowers took the longest to make.
Rubber stamping were in Stazon Jet Black and used: Crafty Individuals, Stamper Anonymous, Paper Artsy Hot Picks, Birds and Nest set from Cox and Cox.
I should of used an aperture card then wouldn't need to cover the edges with paper string: idea-ology.
Finally added small touches using faux gems and flowersoft.
Not too much of background were hidden by embellishment I have been known to over collage things.
I have still have Tim Holtz June tag of 2013 to complete plus my version for February. In the meantime say hello to my new best friend. He is called Oscar and is Syrian hamster I believe is about 3 weeks old.
I brought him on Monday from Pets at Home, in fact all Syrian hamsters are boars (males)
He's panda coloured and I worried about him on Monday and Tuesday he was active and playing on the wheel but changed on Wednesday, barely eats and spends much time in his house and only comes out to collect wood shavings to build a nest. I've checked Oscar last night he doesn't seem to have wet tail and still fairly active. Since he is still new maybe still settling in, I remember what happened to Cherry the Chinese dwarf she suddenly died in within 6 days.
Hang in there little Oscar.

25 May 2013

My submission for Take it, Make it challenge two

This is for Craft Stamper Take it, Make it challenge two and involved tearing and ripping.I decided not to make a card although I can still can because there's still plenty of time and have 2 important things to be completed before this months ends. I feel so energetic right now like a Roborovski hamster. I didn't know Craft Stamper had a challenge going until I went on their site, brought a copy of June issue of their magazine. Used to buy a lot of magazines in the past and was nervous of submitted a card when I did it was gone and none of my ATCs submitted were publish the ATCs swap is gone as well blame this on high cost of postage.
I had some ideas in my head and sketched out a few drawings in my sketchbook mainly to put them to rest so I won't have to keep thinking about them.
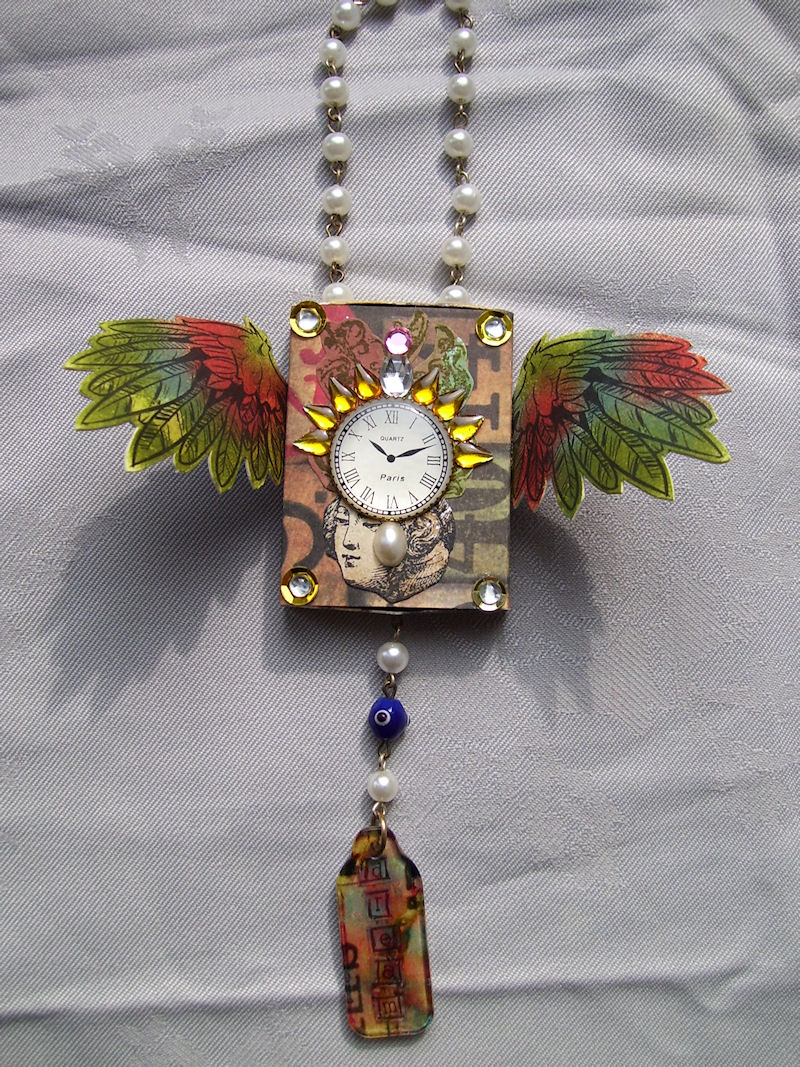
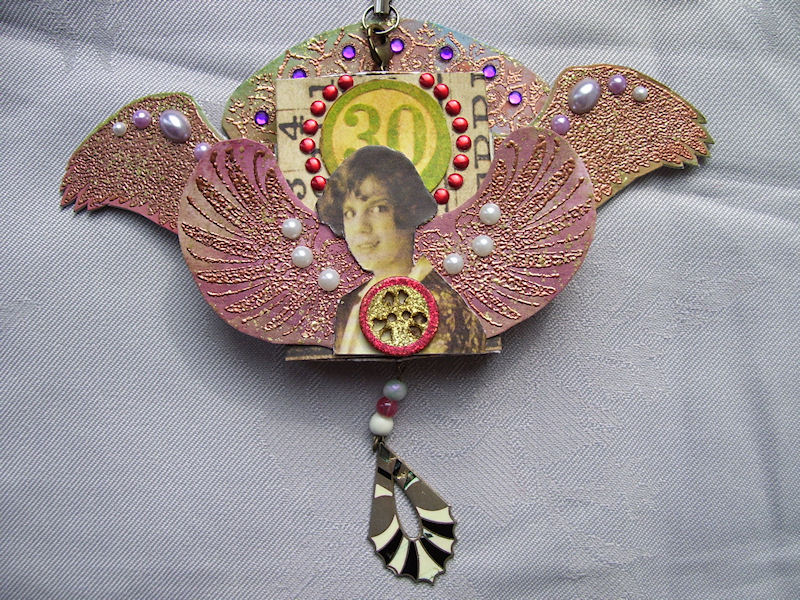
I used Paper Artsy, Ink and Dog Mystery Plate as it came with house like stamp and perfect for making small matchbox shrines. The matchbox template is from Mirkwood designs and decades old, the box itself is made out of Idea-ology Paper Stash of Lost and Found. With all of my designs I don't know how it will turn out like until the object is finished because make it up as I go along.
Paper scraps coloured in Distress Inks/Stains or mixture of both were used for triangles and other pieces. House, labels and other parts were stamped in TLC Violet ink and Staz-on Jet Black. Other stamps used are Stamping bella, Crafty Individuals. I found the if edges look better if they were embossed or outline using a sharpie. Stampendeous Frantage Aged gold embossing powder gives a dynamic texture when used as gilding as the powder has mixture of coarse and fine grains. I wasn't sure to add to central area whether to use stamped image stuck with foams pads, charms or 3D embellishment. 
As you can see here I used charmed made from stamping bird cage from Paper Artsy Hot pick range HP1004EZ on to clear shrink plastic. Archival ink work best but stamping takes some skill.
I added from cross screw heads from Prima marketing- Junkyard finding these are yard I think are suited for scrapbooking or altered arts assemblage. This when jewellery making wire works comes in very useful for attaching metal embellishments which are Route 52, 7 Gypsies and others. As final touch I added a chitchat the whole thing is intended to be hung. This is the third matchbox shrine I've created and managed to acquire 2 of the configuration shadow boxes. Something to try out in the future.

22 May 2013

My entry for the another monthly challenge: How does your garden grow?

This card I decided to enter for May's Country View Craft's challenges because completed and submitted a tag for Tim Holtz's May tag of 2013. I still have my version of February to make give the fact I was forced to endure excessive noise and almost no sleep it has been a struggle. Why and also if I don't craft like every day I get very restlessness and irritable. My household is not the ideal place for crafting it was always my attentions when there's a sunny day with not so much wind to work outside. I rather listen to the songs of nature than the harsh tunes of music player. It's not music it's noise pollution.
Been a while since I made a card the last one was on Mother's day. The challenge for May is entitled "How does your Garden grow"
I have lots sheet of pre-distressed papers in various colours some using Distress Ink, Stains or a mixture of both. The floral stamps set I wanted it's by Paper Artsy, their Hot Picks range HP1004EZ I wanted this for a long time as it contains patterned flower.
I stamped flowers, petals on various paper scraps. The main stem is in Memories: Art Print Brown it didn't show up as much when the moths were added (Stazon- Jet Black). I outline the stem using fineliner. Further moths were stamped using Archival Ink on modeling film, the same kind used in April tag of 2013. A voice in my head kept saying emboss the edges of the petals so I did using Stampedeous Frantage Aged Gold embossing powder and it worked well.
More Distress ink was added onto the backing sheet to tone down the colours Faded Jeans, Walnut Stain and Moss Green. I ran a paper distressing tool on the edges before sticking the background to the add. Used idea-ology custom fastener to fix the flowers together before finally gluing the leaves and stapling the moths using tiny attacher. I added some words from Chitchat stickers the edges were coloured with Walnut Stain. There is an trend of adding large flowers on to card, seen as Create and Craft. This proof you don't need a CD-ROMs, craft sheets or even die cutting maching to make a card. All you ready need is your head but I do recommend buying Compendium of Curiosities vol 1 and 2 as they have tonnes of wonderful idea or go on youtube and watch his videos.
The next step for me is submit something to Craftstamper, I did send some ATCs but sadly they were never published. We'll see. Loads of people of submit of work so you have to create something exceptional to get noticed. I hope one day my work will get this attention. Why can't it be now?
It's the taking part which matters it's just I always improving my skills and there's other techniques I haven't discovered or tried out. 

13 Apr 2013

Free time after 2 weeks of studying

Whenever I update my blog I first have to update my flickr photostream as well after filling in the descriptions its exhausting. I was off for 2 weeks on study learning about customer service and First Aid and had little time to do my posting which is steadily building up. In the free time I did have I managed to make some atcs and few of these.
My tags were chosen at all not be let down I started again and focused to making tags for January. My first tag ends up being too dark even though there's nothing wrong with it. Focusing what the month meant new year, winter and fresh start. Checking back on Tim's previous monthly tag I noticed he used Distress stains Picket Fence along side another colour and gave me an idea.
I used broken china as the additional colour and darken with Distress ink- faded jeans and added some peeled paint. After tinting up the wings I added some stickles it's best to squeeze a blob on craft mat or catalogue in my case and using a your finger to rub some glue on then dry using the heat it tool. If you are careful the inkjet printed image won't smudge as much. Collected some scraps and add them on numbers stamp from fairytale frenzy work great when stamped in forest moss and little outline for extra touch. Most of time I'm staring at the tag what to add because less is more. Chitchat stickers are useful to create your own pearls of wisdom but hard to choose from all those text. As there is no word for 'new' then I thought of what it represents. New day is like blank page in journal ready to filled and life can be one big journey or adventure for the soul. I've finally acquired some crinkle ribbon to finish off the tag, these work best if the ribbon is scrunched and up after colouring and dried under the heat it tool. All done I hope only use one tag for April when rest of materials arrives so expensive buying all of stuff for monthly tag in future I'll use what I have already only buy if necessary. Here is are ones created so far.
Altered this a while ago it's a holder for moo cards and was rather plain I had no idea how to decorate it so as when I brought hot fix tool I used sample gems and stuck them on felt and added charms and clasp. Now attached to my bag.
I've been looking at matchbox shrines for while when I was still studying on the course, there's one discussed by Arttrader magazine and thought to give it a try. On one boring Sunday I was making 9 matchboxes unfortunately I was sick in the evening probably something I ate, a knock on head can cause it well I did bang my head and felt some pain.
This the inside view it's better if the elements were positioned so it resembles a scene. I have collected some much 'stuff' over the years and majority of don't fit. Oh well use a bigger matchbox next time.
I discovered when I was making the matchbox shrine it crosses over with my jewellery making skills. The whole process feels like assemblage not just a collaging a great way to use bit of scrap. I was over the top with the wings, majority of matchboxes I've seen uses butterfly wings why not bird or bat. If you have wings than fly.
I have a lot of clay elements which are too fragile to be used as jewellery, tags and shadow boxes might be useful. It takes 2 days to complete, 1 day for sanding and painting and another for layering of varnishing. I was partly influenced by the configurations these cost money but buy something you can make already it takes a little time.

23 Mar 2013

Why patience is a virtue

It pays to be patience well after I submitted my work to March tag of 2013 I've the noticed the colours of the tags were washed out and not bright compared to other tags. Once again technology has let me down if it's not a tablet it's the camera on the smart phone. You always take pictures using a digital camera in best light as possible. So I tried again this morning its still raining.
This is what the tags suppose to look like and colours are brighter and details are more clearer.
'Light' version I used one of floral imagery from Paper stash- Lost and Found as background and sanded it as suggested on Tim's tag. From the same collection I used rabbit card and distress the edges with Walnut Stain. It may not be clear but flourish masks were used for reversing masking along with Peeled paint, further colours were added Faded Jeans and Ripe Pesimmons.
Great thing about Idea-ology Paper stash is they have reversible distressed colours on the back each sheet. There wasn't anything suitable in coloured papers in my stash so I used a scrap from leftover projects, stamped border motif from Stamper Anonymous- Mini Ornates glued this on thin cardboard (Don't have grungeboard as yet) using glue and seal medium (this comes with handy brush).
I discovered an iron is useful in speeding up the drying time of the glue. Next I cut out circular shape, I don't have any Sizziz dies or even die cutting machine because feel there is no use for one all my cutting is my hand. Used to it because of other papercraft as in assembing paper models.
Stamped writing on several scrap of distressed paper scraps carefully drew floral motifs based on mini floret masks and used Shabby Shutters stickles, once this dried I cut the shapes out and fix them on tag using small brads, Dogwood flowers and beads were added too (From Beadery). Finally added stamped letters (Rubberstampede alphabet set), Stampendous peel offs and die cut motifs.
This tag is second attempt and more carefully planned I used the one below as guide.
I call this 'Dark' version as in more earthly tones were used. The tag was coloured using no wrinkle distressing technique with various colours- Spiced Marmalade, Crushed Olives and Forest Moss. I used Idea-ology Mini Florets masks and rubbed Walnut Stain, stamped various motif from Stamper Anonymous- Mini Ornates, Stampingbella- Bubble wrap in Peeled Paint and Ripe Persimmons. An image of rabbit (Animal Illustration by Dover publications) was added and made a small frame and flower using stamps using the same way as explained from above. The edges were darkened with Walnut Stain and added labels using Dovecraft mini alphabets with some accents using Distress Stickles.
It's too late to replace the photos with the new one I took, I'm tired in fact hadn't slept well for a week now. Sometimes there's too many ideas flowing inside my head or other people are annoying me with excess noise or being general nuisance. Hope to make a few changes to both blogs when I'm back ideally should be update the blog first and then flickr photostream. May this a lesson to take pictures of work in best light conditions as possible.


22 Mar 2013

TAG- now you're it

I have been busy not with cross stitch but organizing all my stuff together but sadly I'm still stuck in same situation I was last year without a permanent workspace. The ideal place for stamping is on the kitchen table lit under daylight I have LEDs daylight simulation lamp pity the batteries last long.
After reading Tim Holtz blog, watching his youtube videos and reading his Compendium of Curiosities I felt inspired to make tags for this month. I made two because wasn't happy with the first attempt never thought of making tags don't see their purpose.
For March: tag of 2013 I will submit them both they are part of set. 
First one I call Dark (because I used earthtones) and the other is Light. They both talk to each and have similar styles. My tags bare no resemble to Tim's because don't have sizzix or use the idea-ology materials I find it's best to make something more of your style like own personal interpretation of the project. 
Picture quality is not good as I've take this on my smart phone ideally I would take a picture using my digital camera in good daylight one thing in the UK it always rains and rains some more.
Much of what I used is explain in my flickr photostream I find it's good to have a source of vintage royality free images the rabbit is from Dover books.
See the colours are more subtle or could be because of poor light conditions. I'm not going to wait till tomorrow to do this why not now. Actually, last week I wanted to make stuff but couldn't because unsuitable condition it's too noisy and the table wasn't free. So I said to myself stop waiting and start doing. This was finished when first half ended of England vs San Marino match.
Here's another tag I made this is for second monthly swap of new yahoo group I've joined. Actually take on ATC I once made for Blue theme swap.

I was giving crushed jewels techniques to try and didn't realise you can add glitter, embossing powder, shaved ice at the same time. Oh well it pays to follow the instructions very carefully.
Okay I admit I went on a spending spree on buying Distress Inks, Stains and idea-ology finding will was for ATC swap now I have more variety for other things. I'm interested in making shadow boxes or personal shrines been a while since last made one. Well I have to find a way to use Paper stash pad I should really stop there's still more Stains and idea-ology, Stamper anonymous stamps to get but they are so expensive. Mini ornates cost £24.99 and you can't just have one.
No seriously I have to stop buying craft materials plus there's unfinished projects to do. There's further news from this post.

12 Oct 2012

How Flower of Life brought back my creativity

Been a while since I last updated this page I have been busy and just when I want to blog or upload photos to my flickr account the internet connection goes kaput. Don't know what caused it maybe the weather or interference by other router. I had to buy a dongle until the problem is resolved it's fine so far. I hate surfing or doing stuff on mobile everything is small and keys touch screen a nightmare.
I was working on biscornu Pagoda or biscobud. There's isn't much of patterns, I woke today and figured out to make this type of biscornu. Use a large pattern and smaller which is less than half, third of the size is better. Next was problem was trying to assemble the whole thing together. This project is complete turns out best to make the tuffet first before attempting the pattern as both have similar construction techniques. Completed work will be in my flickr photostream. There's a biscornu kit yet to completed for some strange reason I don't like making it.
During the Olympic was hooked on kumihimo, this is Japanese style of braided cord and much easier and faster than first time I tried. You can complete in a day or so. I used bamboo cord in the picture, I made another using 2 strands of embroidery skeins. I actually find my mini kumihimo plate when tried buy another one it was sold out. This one is from Beads Direct. I brought one from Amazon turned out to be huge. The braiding plate wasn't the only thing I've lost, can't find my bead soup plus whole other stuff.
After the kumihimo adventure I decided to return to papercraft as in assembling paper models. There's something about createandcraft I'm not happy about. There's an accumulative postage on their site I brought fabric gelly roll, Little Watbo kit and Papermania watercolour pencils end up as £50 including postage. Scam and overpriced this is as bad as Hobbycraft. Well you don't need such and such to make art all you need is some imagination. This model is Azura's or Black star from Skyrim. I'm going slowly, slowly so far about 20% in completion. 
I was surfing on the internet and discovered a site which sold Friendly Plastic, I always wanted to this material. When I got my order I felt cheated because the colour is just a film on top of black strip. After much struggle I created this. I shouldn't attempt to flatten after the 3D elements were pressed in. The whole thing curves on left to right. Friendly Plastic is very malleable when heated I only need a heat gun.

For a while I felt extremely depressed just looking out of window and wondering what is life for. Then I discovered sacred geometry through watching Spirit Science videos on youtube and came across Flower of Life which has template, code from which all life is created. I made many Flower of Life atcs, mandala before deciding I was ready to make atcs again. I've completed some art books and love to share them. There's still other things to explore I thank Spirit Science for helping me to strengthen my spiritual awareness. If you are curious and have open heart take a look this channel it will enlighten.

14 Sept 2010

Completed projects so far


Not much is happening, I decided to continue with the challenging Blade Liger and try to assemble the rest of the legs. Here are projects I manage to complete.
The felt teddy pattern is from a website and originally scanned from a Japanese book. I can't find the link to site as maybe closed down. I had trouble sewing the head because the parts wouldn't fit together and not happy with the eyes as they are too far apart.
I brought K and Company mini memory book kit to give scrap book a go. I was going to do art journalling but dislike the thought of having my private musing open to the public (doesn't matter because I rant in my blog anyway.) and because haven't done any altered books for a long time.
View of inner pages, I tend to use scraps already in my collect as diecuts and decoupage sheets are of no use to me. Printed images of various photos on the self adhesive paper. Some of the materials in my collection haven't been used for years.
Turns out there wasn't room to add everything in the kit, I had a flap which opens to reveal more imagery. I noticed K and Company scrapbook material tend to be compatible with each other. Over collaging is tend to be a habit of mine the underneath imagery is obliterated by the layer above.